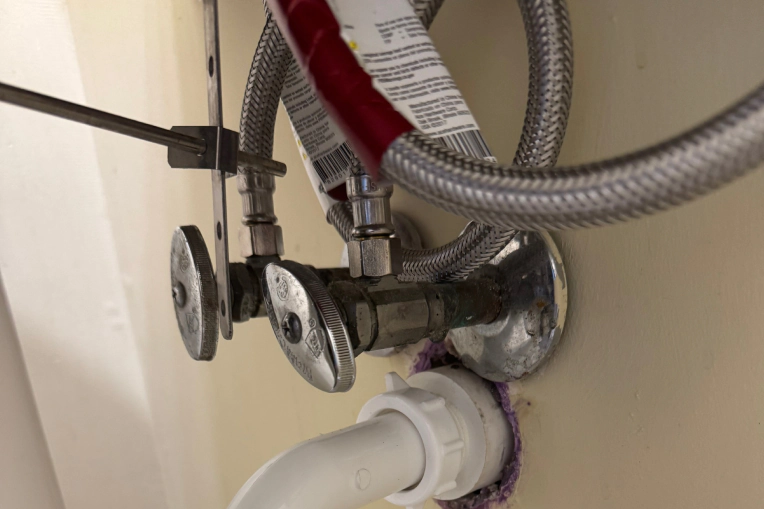
Step 1: Check your water meter and look for unusual activity
Your water meter is the single most reliable tool for confirming whether you have a leak anywhere in your home. This test works because the meter measures every drop of water flowing through your system. If it’s spinning when nothing is running, you’ve got a problem.
Start by turning off every water fixture in your house. That means toilets, faucets, washing machines, dishwashers, ice makers, and outdoor hoses. In Suffolk, where many homes have irrigation systems for lawns, make sure those are completely off too. Walk through each room and double-check. Even a single running faucet will throw off your results.
Once everything is off, head to your water meter. It’s usually located near the street or in a utility box outside your home. Write down the numbers on the meter dial, or take a photo with your phone. Wait 30 minutes without using any water, then check the meter again. If the numbers have changed at all, water is moving through your system somewhere, and that points to a leak.
This test is especially useful in Suffolk’s older neighborhoods near downtown, where galvanized pipes installed decades ago are reaching the end of their lifespan. Even a small leak in an aging pipe can waste hundreds of gallons per month and spike your water bill. If your meter test shows movement, it’s time to narrow down the source. Inside Out Plumbing LLC offers professional leak detection services that use advanced listening devices and thermal imaging to locate hidden leaks without tearing apart your walls. Sometimes the most efficient DIY step is knowing when to call in the pros.
Step 2: Inspect under sinks and around cabinets for moisture
The space under your kitchen and bathroom sinks is one of the most common spots for leaks to develop. These areas are out of sight, so small drips can go unnoticed for weeks or even months, causing water damage, mold growth, and cabinet rot. Catching problems early saves you from expensive repairs down the road.
Grab a flashlight and get down on the floor to inspect each cabinet thoroughly. Look at the P-trap (the curved pipe that prevents sewer gas from entering your home), the supply lines that feed hot and cold water to your faucet, and the connections where those lines attach. Run your hand along the pipes to feel for dampness. Check the cabinet floor for water stains, warping, or soft spots in the wood. In Suffolk’s humid climate, moisture under sinks can accelerate mold growth faster than in drier regions, so any dampness you find needs immediate attention.
Pay close attention to the base of the faucet itself. Water pooling on the countertop around the faucet base often indicates a worn-out O-ring or gasket inside the faucet body. While you’re down there, turn on the water and watch the connections while the water flows. Sometimes leaks only appear under pressure. If you see drips forming at a connection point, try tightening the fitting with an adjustable wrench. Many slow leaks at supply line connections can be stopped with a quarter turn of the nut.
If tightening doesn’t solve the problem, or if you notice corrosion on the pipes, it’s time to replace the damaged parts. For homeowners who aren’t comfortable with plumbing repairs, Inside Out Plumbing LLC provides fast faucet repair and pipe repair services throughout Suffolk. A quick professional fix now prevents the kind of water damage that leads to full cabinet replacement later.
Step 3: Test your toilets for silent leaks with food coloring
Toilets are notorious for silent leaks that waste water without making a sound. A worn flapper valve inside the tank can let water seep continuously into the bowl, and you’ll never hear it. Over time, this type of leak can waste thousands of gallons and add serious dollars to your water bill. The good news is that testing for toilet leaks takes less than five minutes and costs almost nothing.
Remove the lid from your toilet tank and add 10 to 15 drops of food coloring directly into the tank water. Any color works, but darker colors like blue or green show up more clearly. Don’t flush. Just let the toilet sit undisturbed for 15 to 20 minutes. During this time, if the flapper is leaking, the colored water will slowly seep from the tank into the bowl.
After waiting, check the water in the bowl. If you see any trace of color, you have a leak. The flapper is a rubber seal at the bottom of the tank that lifts when you flush and then settles back down to hold water in the tank. Over time, the rubber degrades, especially in areas with hard water or chlorinated municipal supplies like Suffolk’s. When the flapper no longer seals tightly, water trickles through constantly.
Replacing a flapper is one of the easiest DIY plumbing fixes. You can buy a universal flapper kit at any hardware store for a few dollars, and installation usually takes 10 minutes. Turn off the water supply to the toilet (the valve is on the wall behind the bowl), flush to empty the tank, unhook the old flapper, and snap the new one into place. If you’re not confident doing this yourself, or if the leak persists after replacing the flapper, Inside Out Plumbing LLC handles toilet repair quickly and affordably. Sometimes the issue isn’t the flapper at all but a cracked flush valve or tank, and a professional can diagnose that in minutes.
Step 4: Examine outdoor faucets, hoses, and irrigation connections
Outdoor plumbing is easy to overlook, but it’s just as prone to leaks as the fixtures inside your home. Hose bibs, garden hoses, sprinkler systems, and pool plumbing all develop leaks over time, and because they’re outside, the water damage often goes unnoticed until you see a spike in your bill or a soggy patch in your yard.
Start by inspecting every outdoor faucet. Turn each one on and off, and watch closely for drips from the spout or around the handle. Check where the faucet connects to the exterior wall of your home. If you see water staining on the siding or feel dampness around the connection, the pipe inside the wall may be leaking. This is more common in Suffolk’s older homes, where freeze-thaw cycles (even our mild winters) can crack outdoor pipes that weren’t properly insulated.
Next, walk your property and look for wet spots in the lawn or garden beds, especially areas that stay damp even when it hasn’t rained. Underground irrigation leaks are surprisingly common, particularly in systems installed more than a decade ago. PVC fittings can crack from ground shifts, and sprinkler heads often develop leaks at the base. If you have an irrigation system, run it through a full cycle and watch each zone. Look for geysers, misting, or pooling water that shouldn’t be there.
Don’t forget to inspect garden hoses and hose connections. A worn washer inside the hose coupling can cause a steady drip every time the hose is attached. Replace washers annually to prevent this. If you discover an outdoor leak you can’t fix yourself, or if you suspect a leak in an underground line, professional help is the smart move. Inside Out Plumbing LLC offers outdoor plumbing system repair and can locate and fix buried leaks without tearing up your entire yard.
Step 5: Inspect your water heater and surrounding pipes for leaks
Your water heater works hard every single day, and over time, tank corrosion, loose fittings, and valve failures can lead to leaks. A slow drip from a water heater might seem minor, but it can signal a tank that’s about to fail. Catching small leaks early gives you time to plan a replacement instead of dealing with an emergency flood.
Start by visually inspecting the area around your water heater. Look for puddles, dampness on the floor, or rust stains on the tank itself. Check the temperature and pressure relief valve on the side or top of the tank. This valve is designed to release water if pressure builds too high, but sometimes it starts dripping due to sediment buildup or a faulty mechanism. If you see water dripping from the valve’s discharge pipe, the valve may need replacing.
Next, trace the cold water inlet and hot water outlet pipes at the top of the tank. These connections can develop leaks if the fittings loosen over time. Tighten any connections that look wet using a pipe wrench, but be gentle. Overtightening can crack fittings, especially on older units. Also inspect the drain valve at the bottom of the tank. This valve is used to flush sediment from the tank, and it can start leaking if the seal wears out. If tightening the valve doesn’t stop the drip, it may need to be replaced.
Pay special attention to the base of the tank. If you see rust or corrosion around the bottom, the tank itself may be leaking. This is a sign the water heater is nearing the end of its life. In Suffolk, where many homes have water heaters located in garages or crawl spaces, humidity can accelerate rust formation. A leaking tank cannot be repaired and must be replaced. Inside Out Plumbing LLC provides professional water heater installation and can help you choose an efficient replacement that fits your home’s needs. If you’re unsure whether a drip is minor or a sign of a bigger problem, a quick inspection by a licensed plumber can give you peace of mind and help you avoid a middle-of-the-night water heater failure.